How to Make a Potato Battery
Making a clock run on potato power is easier that you might think. This project is easy, bizarre and makes a sweet science fair project or chemistry experiment. Who knew potatoes could be so empowering?
What You Need:
- Two Potatoes
- Two short pieces of heavy copper wire
- Two common galvanized nails
- Three alligator clip/wire units (alligator clips connected to each other with wire)
- One simple low-voltage LED clock that functions from a 1- to 2-volt button-type battery
Steps:
- Remove the battery from the battery compartment of the clock.
- Make a note of which way around the positive (+) and a negative (-) points of the battery went.
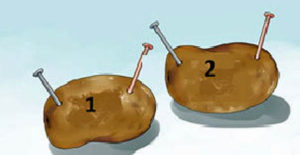
- Number the potatoes as one and two.

- Insert one nail in each potato.
- Insert one short piece of the copper wire into each potato as far away from the nail as possible.
- Use one alligator clip to connect the copper wire in potato number one to the positive (+) terminal in the clock’s battery compartment.
- Use one alligator clip to connect the nail in potato number two to the negative (-) terminal in the clock’s battery compartment.
- Use the third alligator clip to connect the nail in potato one to the copper wire in potato two and set the clock!
How the Potato Clock works
A potato battery is an electrochemical battery, otherwise known as an electrochemical cell. An electrochemical cell is a cell in which chemical energy is converted to electric energy by a spontaneous electron transfer. In the case of the potato, the zinc in the nail reacts with the copper wire. The potato acts as a sort of buffer between the zinc ions and the copper ions. The zinc and copper ions would still react if they touched within the potato but they would only generate heat. Since the potato keeps them apart, the electron.
